If your organization uses cargo-monitoring (supply-chain) devices and your user role has viewing cargo-tracking privileges enabled, you can use the Gateway History feature to map where a device (or multiple devices) has been for a given period of time, seeing the route it took (if it is in motion) and the conditions it experienced (via the readings it reported to iOn). The grid data includes data readings from temperature, shock, tilt, and light sensors, location, and battery level. This can help you identify threshold breaches and keep aware of low battery values.
To view the history for one or more devices' readings, follow these steps:
- On the sidebar menu on the left of the screen, click
 .
.
- Click Gateway History on the flyout menu that appears.
Note: You also can launch Gateway History for a single device by opening its pop-up and clicking .
.
A blank version of the report will appear.

- Click the Groups/Assets drop-down arrow at the top of the screen.
Your selected group will be displayed (City of Meryton in the example in the following figure). It should be automatically expanded to show its subgroups. (If not, an expansion arrow will appear to the left of its name.)
Note: If you want to view the history for a group above this group, you'll need to change the group you have chosen in the Group Chooser, as shown in Choosing a Group to View Globally. If you want to view a group that is above your assigned group in your account hierarchy, you'll need to obtain different permissions from your organization's iOn administrator.
Note: Include Unlinked SC Devices (at the bottom right) is selected by default, which means that cargo-monitoring devices that aren't associated with an asset but have been added to iOn will also be displayed. If you want to see only devices assigned to an asset, you can deselect this. - If the groups or devices you are mapping history for are subgroups or in subgroups, click the expansion arrow of the parent group (
 ).
).
If you need devices in one or more of their subgroups, click to the left of the higher-level group's name — and keep doing so down the hierarchy until you reach the groups you want.
- To map history for entire groups, select the groups' check boxes. (
 means selected, and
  deselected.)
To map history for individual devices, click the More Options ( ) icon under the group they belong to.
The group's devices (and assets) will be displayed.

Then select each device's check box.
Note: You can choose single devices under different groups as well.
Caution: The number of devices times the number of days cannot exceed 40 (so you could return the history for 40 devices for one day, or 20 devices for two days). - Click Done.
The history of readings for today of your chosen groups and devices will appear. Each device's values will appear in its own row.
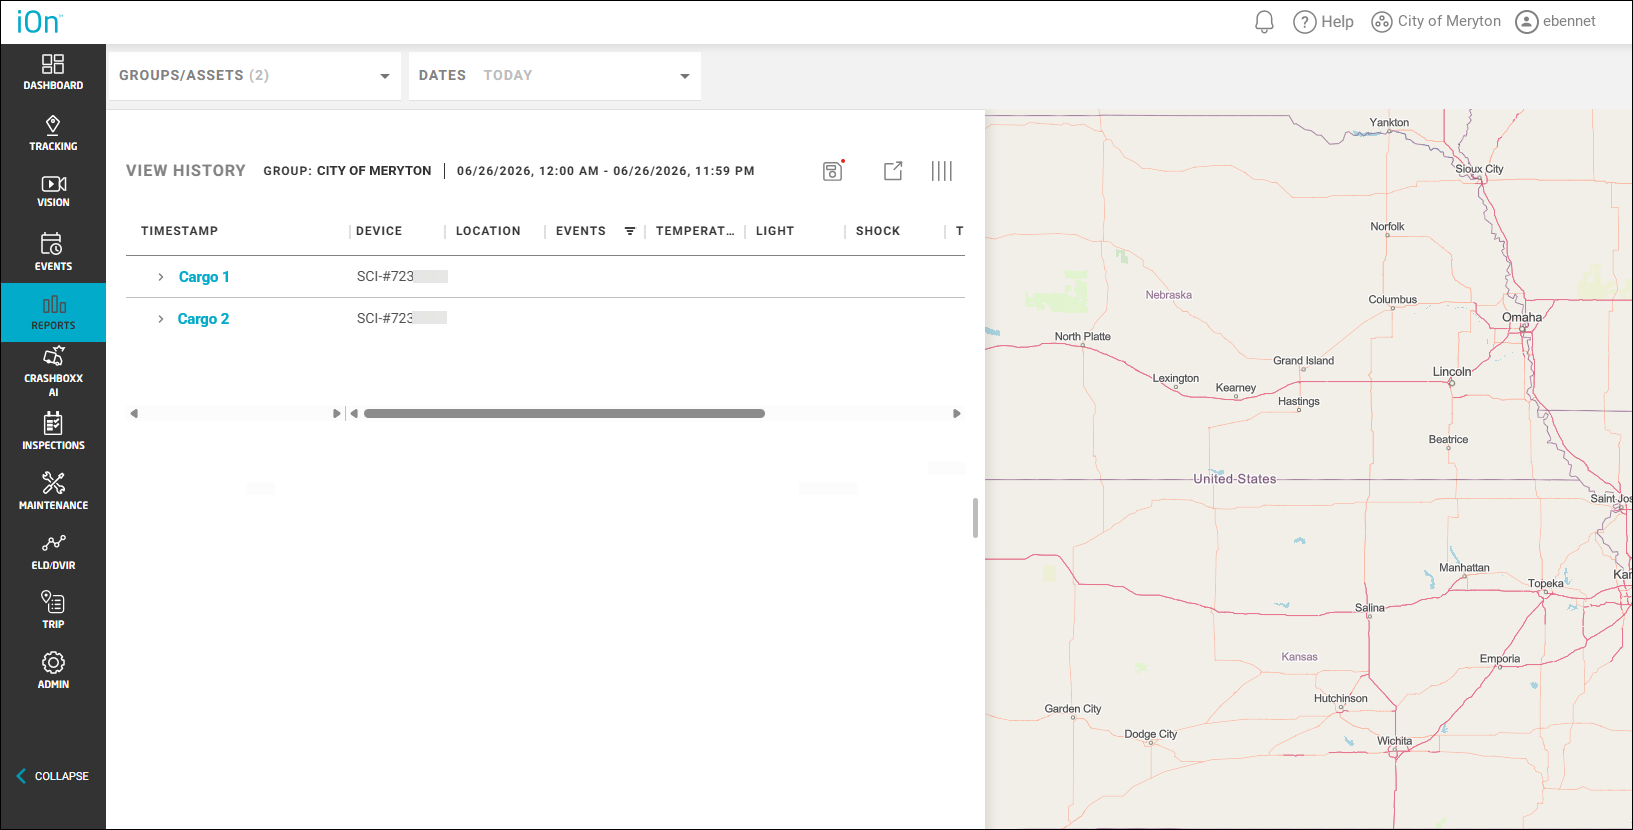
Note: If you need more screen real estate for either the grid or map, you can click and drag the handle separating the two right or left.
Each device's path line will have its own color to help differentiate it from the others.

- To view the results of one of the devices, click its name in the grid.
The map will zoom in on it.
- If you need a different date range than today, follow these steps:
- Click the Dates drop-down arrow at the top of the page.
Time period options will appear.

- To choose one of the common time frames, click the radio button for Today, Yesterday, Last 7 Days, or Last 30 Days and skip down to step e.
To specify particular dates, click Custom.
Calendars for the current and following months will appear. (If your window width is smaller, you may see only the current month.)

- To select the first date, you can click the day on this month's calendar; click
 until you find the correct month and then select the day on its calendar; or type the date in the top field on the left (in the format mm/dd/yyyy hh:mm Xm), such as "08/30/2026 12:00 am."
- To select the end date, you can click the day on the calendar or type the date in the second field on the left (in the format mm/dd/yyyy hh:mm Xm), such as "09/08/2026 11:59 pm."
Caution: The maximum number of days you can include in the range is 40. - Click Done.
The map and grid will be updated with the events for the time range you selected.
- Click the Dates drop-down arrow at the top of the page.
- Click the expansion arrow (
 ) for a device to view all the readings that were reported for it within your chosen time range. (You can scroll down if needed to see all the values.)

Each row shows the readings reported by the device at that minute. How often the values are sent to iOn depends on the reporting rate you set in the device's Edit Device dialog box (see Editing a Cargo-Monitoring Device).
Caution: Be careful with the reporting rate. A rate of every five minutes will use up significantly more battery power than a rate of one hour. - If you want to select particular events to view, you can filter the Events column. (See Sorting and Filtering Column Data if needed.)
- To see more of the grid's columns, scroll right at the bottom.
Note: Alternatively, you can place your cursor over the grid, press Shift, and scroll your mouse wheel to view columns to the right or left.
The Events, Temperature, Light, Shock, Tilt, Stationary, and Battery columns of readings are displayed by default. In addition, you can add columns by clicking at the top right of the grid and following the steps in Customizing Displayed Columns.
- You can select a row of readings in the grid to view it in particular on the map.
The map will zoom in on that time in the device's path line and display a pop-up of the values that were sent (and the timestamp).

- You can export the grid information to a CSV (comma-separated value) file by clicking
 at the top right of the data pane.
- If you don't have iOn save grid modifications you make automatically for all the application’s screens (if the Automatically Save Grid Settings toggle in the Preferences area of My Profile is deselected — see Viewing Your Profile and Setting Your Preferences), you can save any layout changes you've made to the History grid by clicking
 . (If you haven't made any layout updates you can save,
  will be above the grid instead.) See Saving Grid Changes for an Individual Screen for more details.